Is your Viking ice maker no longer working as efficiently as it used to? Perhaps it has stopped producing ice altogether, or maybe it’s making strange noises that weren’t there before. While these issues may seem alarming, many common ice maker problems can be resolved with a simple component replacement. Instead of paying for costly repairs, why not try a DIY Guide to Replacing Ice Maker Components? In this article, we’ll walk you through the steps necessary to fix your ice maker, saving you both time and money.
Understanding the Problem: Why Ice Makers Fail
Ice makers, like all appliances, are susceptible to wear and tear over time. The most common causes of ice maker malfunction include:
- Faulty water inlet valve – This part controls the flow of water to the ice maker. If it’s broken, no water will enter the machine, which means no ice.
- Malfunctioning thermostat – A broken thermostat may cause your ice maker to think it’s either too cold or too warm, disrupting ice production.
- Clogged or frozen water line – Over time, mineral deposits or freezing temperatures can block the water line, cutting off the supply of water to the ice maker.
- Worn-out ejector blades – The blades responsible for pushing out the ice cubes can wear out, preventing ice from being dispensed.
Once you’ve identified the potential problem, it’s time to dive into the solution: DIY Guide to Replacing Ice Maker Components.
Step-by-Step DIY Guide to Replacing Ice Maker Components
Before you begin, make sure you have the necessary tools: a screwdriver, a wrench, and replacement parts (specific to your ice maker model). Always remember to unplug your refrigerator and turn off the water supply to avoid electrical or water damage.
Step 1: Remove the Ice Maker Unit
- Unplug the Refrigerator: Safety first! Always disconnect the appliance from the power source before starting any repairs.
- Turn Off the Water Supply: Locate the water valve behind your refrigerator and turn it off.
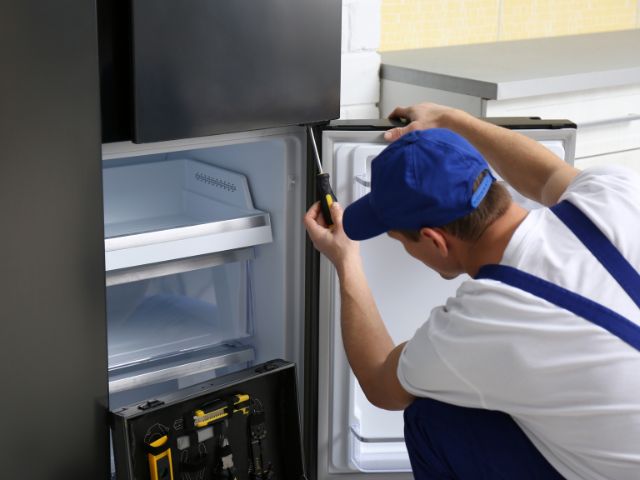
- Access the Ice Maker: Open the freezer compartment and locate the screws that hold the ice maker unit in place.
- Unscrew the Ice Maker: Use a screwdriver to remove the screws and gently detach the ice maker from its mounting bracket.
Step 2: Replace the Water Inlet Valve
- Locate the Valve: The water inlet valve is typically located at the back of the refrigerator.
- Disconnect the Water Line: Use a wrench to carefully disconnect the water line from the valve.
- Remove the Valve: Unscrew the mounting screws and unplug the electrical connections.
- Install the New Valve: Attach the new valve by reversing the removal process—connect the water line, secure the mounting screws, and plug in the electrical connections.
Step 3: Replace the Ice Maker Thermostat
- Access the Thermostat: The thermostat is located within the ice maker unit. You may need to remove the front cover of the ice maker to access it.
- Disconnect the Wires: Use a screwdriver to remove any screws holding the thermostat in place, and carefully disconnect the wires.
- Install the New Thermostat: Attach the new thermostat by reconnecting the wires and securing it with screws.
Step 4: Clear the Water Line (If Clogged or Frozen)
- Inspect the Water Line: If your ice maker isn’t getting water, the line might be clogged. Remove the water line from the back of the refrigerator and check for any debris or ice buildup.
- Clear the Line: If it’s clogged, flush it with warm water. For a frozen line, use a hairdryer to melt any ice inside. Make sure the line is completely clear before reconnecting it.
Step 5: Replace the Ejector Blades (If Worn Out)
- Locate the Blades: The ejector blades are found within the ice maker assembly.
- Remove the Blades: Carefully unscrew and remove the blades from the unit.
- Install New Blades: Attach the replacement blades and secure them with screws.
Step 6: Reassemble the Ice Maker
- Reattach the Ice Maker: After replacing the faulty components, reattach the ice maker unit to the freezer wall using the original screws.
- Reconnect the Water Supply: Turn the water valve back on and check for any leaks around the water line connections.
- Plug in the Refrigerator: Finally, plug the refrigerator back into the power source.
Step 7: Test the Ice Maker
- Wait for Ice Production: After replacing the components, allow the ice maker to go through one full cycle (this could take a few hours) to confirm that everything is working as it should.
- Check for Proper Operation: If your ice maker is producing ice and dispensing it properly, then congratulations—you’ve successfully completed your DIY Guide to Replacing Ice Maker Components!
Wrap-Up
Replacing ice maker components might seem daunting, but with the right tools and guidance, it can be done by any homeowner. Not only will you save money by avoiding professional repair fees, but you’ll also extend the lifespan of your appliance. Remember to always consult your ice maker’s manual for any specific instructions or safety warnings. If you’re not comfortable with any part of the process, don’t hesitate to call the experts at Viking Appliance Repair Pros for professional assistance.
FAQs
- How do I know which component is causing the problem in my ice maker?
- Common symptoms, such as a lack of water flow or temperature inconsistencies, can point to specific component issues. It’s a good idea to check the water inlet valve, thermostat, and water line.
- Can I use universal parts for replacing ice maker components?
- It’s best to use parts that are specific to your refrigerator model to ensure compatibility and proper functioning.
- How long does it take to replace an ice maker component?
- Most component replacements can be completed in under an hour, depending on your experience and the complexity of the repair.
- Is it safe to perform these repairs myself?
- Yes, as long as you follow safety precautions such as unplugging the appliance and turning off the water supply, DIY ice maker repairs are generally safe for homeowners.
Catch up on what you missed in our previous article about Repairing a Frozen Ice Maker.


