Your Viking oven is a premium kitchen appliance that deserves proper care and maintenance. When the interior light burns out, it’s more than just an inconvenience—it affects your ability to monitor cooking progress without opening the door and losing valuable heat. Understanding Viking oven light bulb replacement empowers you as a homeowner to maintain your appliance’s functionality while knowing when professional assistance becomes necessary.
Understanding Your Viking Oven Light System
Viking ovens feature sophisticated lighting systems designed to withstand extreme temperatures while providing optimal illumination. These aren’t ordinary household bulbs—they’re specially engineered high-temperature halogen or incandescent bulbs that can endure the intense heat generated during cooking cycles. The light assembly typically consists of the bulb itself, a protective glass cover, and sometimes a metal housing that shields the bulb from direct heat exposure and potential damage from cookware.
Most Viking oven models position the light fixture on the back wall or upper side panel of the oven cavity. This strategic placement ensures even lighting distribution while keeping the assembly away from direct contact with food or cooking vessels. The protective cover serves a dual purpose: it prevents grease and food particles from coating the bulb while containing any glass fragments should the bulb unexpectedly shatter due to thermal stress.
Essential Safety Precautions Before Starting
Safety must be your absolute priority when performing any appliance maintenance. Before attempting Viking oven light bulb replacement, completely disconnect the oven from its power source. For hardwired units, switch off the dedicated circuit breaker at your electrical panel. For plug-in models, unplug the power cord from the wall outlet. This critical step eliminates any risk of electrical shock during the replacement process.
Allow your oven to cool completely—at least two hours after the last use. The oven cavity and light fixture can retain dangerous levels of heat long after cooking ends. Touching hot components can result in serious burns. Additionally, installing a new bulb in a hot fixture can cause the bulb to crack or shatter immediately due to thermal shock.
Tools and Materials You’ll Need
Gathering the right supplies beforehand streamlines the replacement process and prevents mid-project interruptions.
- Correct replacement bulb specified for your Viking oven model
- Clean, soft cloth or towel for handling the bulb
- Small screwdriver (for certain cover types)
- Flashlight or headlamp for adequate lighting
Step-by-Step Replacement Process
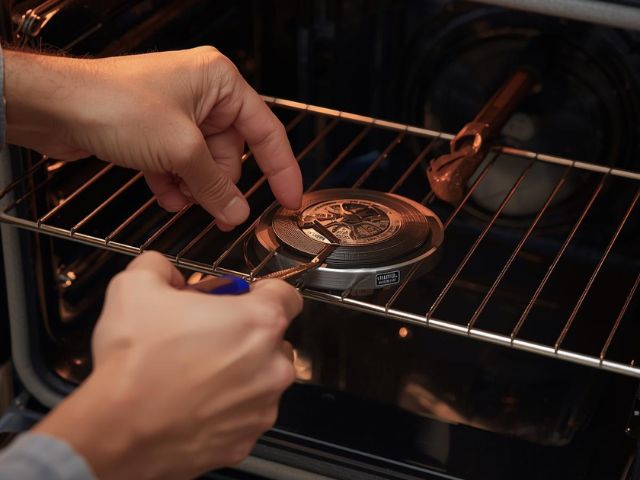
- Begin by opening the oven door fully to provide maximum access to the light fixture. Locate the protective glass cover over the bulb—it’s typically circular or rectangular and may have a slight metal rim.
- For twist-lock covers, rotate counterclockwise approximately a quarter turn until it releases. Some models feature covers secured with a single screw or small clips that require gentle pressure to disengage.
- Once the cover is removed, set it aside on a safe surface. Using your clean cloth as a barrier, grasp the old bulb firmly and turn it counterclockwise to remove it from the socket.
- If the bulb resists, avoid forcing it—excessive pressure can break the bulb or damage the socket. Instead, try gently rocking it back and forth while turning. If the bulb has shattered, carefully remove all glass fragments before proceeding.
- Inspect the socket for any signs of corrosion, discoloration, or damage. Clean any debris or buildup using a dry cloth.
- Take your new bulb, still wrapped in the protective cloth to prevent skin oil transfer, and insert it into the socket. Turn clockwise until it seats firmly but without over-tightening.
- Clean the protective glass cover with a mild detergent solution, removing any grease or residue that accumulated during regular oven use. Dry it thoroughly before reinstalling.
- Position the cover over the light fixture and secure it by reversing the removal process—turning clockwise for twist-lock designs or reattaching screws and clips for other models. Ensure the cover sits flush against the oven wall with no gaps.
Testing Your Work
Restore power to your oven by switching the circuit breaker back on or plugging the power cord into the outlet. Turn on the oven light using the dedicated light switch, typically located on the control panel. The new bulb should illuminate immediately with bright, even light. If it doesn’t light up, recheck that the bulb is properly seated in the socket and that power is fully restored.
Open and close the oven door several times to verify that any automatic light features function correctly. Many Viking ovens illuminate the cavity automatically when the door opens. Run a brief heating cycle to ensure the bulb continues functioning under operating temperatures. Monitor the light during the first few uses to confirm stable performance.
When to Call Professional Help
While Viking oven light bulb replacement is generally straightforward, certain situations warrant professional expertise. If you’ve replaced the bulb but it still doesn’t illuminate, the problem likely involves electrical components beyond the bulb itself—faulty wiring, a defective socket, or control board issues require trained diagnosis and repair.
Repeated bulb failures indicate underlying problems such as voltage fluctuations, inadequate ventilation around the light assembly, or defective fixture components. Physical damage to the light socket, cracked or broken cover assemblies, or any signs of electrical burning or melting demand immediate professional attention. These conditions pose safety risks that DIY repairs cannot adequately address.
If you’re uncomfortable working with electrical appliances, lack confidence in identifying the correct replacement bulb, or simply prefer the assurance of professional service, there’s absolutely no shame in seeking expert assistance. Premium appliances like Viking ovens represent significant investments that deserve proper care.
Final Thoughts
Maintaining your Viking oven’s lighting system ensures you can cook with confidence and precision. Viking oven light bulb replacement is a manageable task for most homeowners when approached with proper preparation, safety consciousness, and attention to detail. Regular bulb replacement keeps your oven functioning optimally while allowing you to monitor your culinary creations without heat loss.
Understanding your appliance’s specific requirements, using appropriate replacement parts, and knowing when to seek professional help protects both your safety and your investment. With the knowledge you’ve gained from this guide, you’re equipped to handle this essential maintenance task efficiently.
Expert Viking Oven Services When You Need Them Most
Don’t let appliance issues disrupt your kitchen routine. Viking Appliance Repair Pros delivers fast, reliable repair services for all Viking appliances. Our certified technicians bring expertise, genuine parts, and guaranteed workmanship to every job. Schedule your service call today and experience the difference professional care makes.
FAQ
How often should I replace my Viking oven light bulb? Oven light bulbs typically last 1-2 years with normal use, though this varies based on how frequently you use the light feature. Replace the bulb immediately when it burns out to maintain proper oven functionality and cooking visibility.
Can I use a regular light bulb in my Viking oven? Never use standard household bulbs in your oven—they cannot withstand high temperatures and will fail quickly or shatter. Always use appliance-rated bulbs with the specific wattage and type designated in your Viking oven’s manual.
Why does my Viking oven light keep burning out quickly? Frequent bulb failure usually indicates electrical problems like voltage issues, a faulty light socket, or poor ventilation around the fixture. Excessive door openings causing thermal cycling can also shorten bulb life—if problems persist, contact a professional technician.
For more insights on maintaining your Viking appliances and understanding when professional service delivers better value than DIY attempts, check out our previous blog: Viking Appliance Repair Pros vs DIY Fixes: What’s the Real Cost.